|
In a nutshell, Breyer model horses are addictive plastic toys.
-
In the big picture, there is a whole culture revolving around these miniatures; there are model horse shows, (much like real horse shows), there are collectors, there are customizers – you name it, it’s a big deal.
For more information , do a search Online as there are some great resources.
Here, I’m just kind of outlining my experiences for others like me. I am focusing on the customizing; I’ve done the rest of it and had my fun; customizing is a whole ‘nother world.
First step: Get a Teacher
I’d recommend for those starting out that they search out a mentor.
I was very blessed to have a great teacher, Mary Soderlund, who started classes and a club and opened her home to a number of young pupils who were there to cut up rather expensive toys. 
I wish I had owned a camera so that I could have pictures of some of her beautiful work. Her horses were grand and gorgeous. Also very inventive, she made her own patterns for tack, pioneered new methods in customizing anything from the mane and tail to a 3 dimensional, realistic river body in a model horse diorama.
2 nd Step:
Get the right tools.
I can’t stress this enough. Now our teacher lent us her tools, which was great, but when I moved away this became a big problem.
What you need:
Dremel (preferably a 2 speed – or more, and battery operated models aren’t as powerful and don’t last as long, but I really hate sitting next to a wall or outside at an outdoor plug in in the direct sunlight, with all the bugs crawling on me, biting me, etc etc). Approximately $40.
Heat Gun, Embossing gun, Paint Strip Gun – Don’t skimp on this. A hairdryer just takes too long and isn’t as effective. A candle or a lighter will work but is more dangerous – trust me. Boiling takes FOREVER and is a real pain.
Painters Tape (just the cheapy kind)
Tinfoil (any brand)
Armature wire (many types of wire are good, I use scrap wire I find here on the farm – anywhere from hanger wire to fencing that breaks at the weld will work – but I like stuff I can twist without using pliers.)
Sandpaper (pick up a pack at the Dollar Tree).
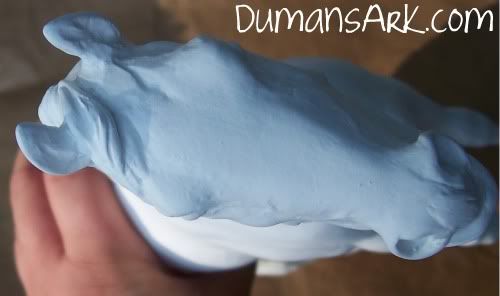
Epoxy – I use Magic Sculp. Many use Apoxie, and other brands. You’ll have to find what you like
Rubbing Alcohol – used for smoothing out the epoxy. Trust me. You’ll want this. Some use water, and maybe Apoxie works better with it, but Magic Sculp doesn’t do a whole lot when you add water.
3 rd Step:
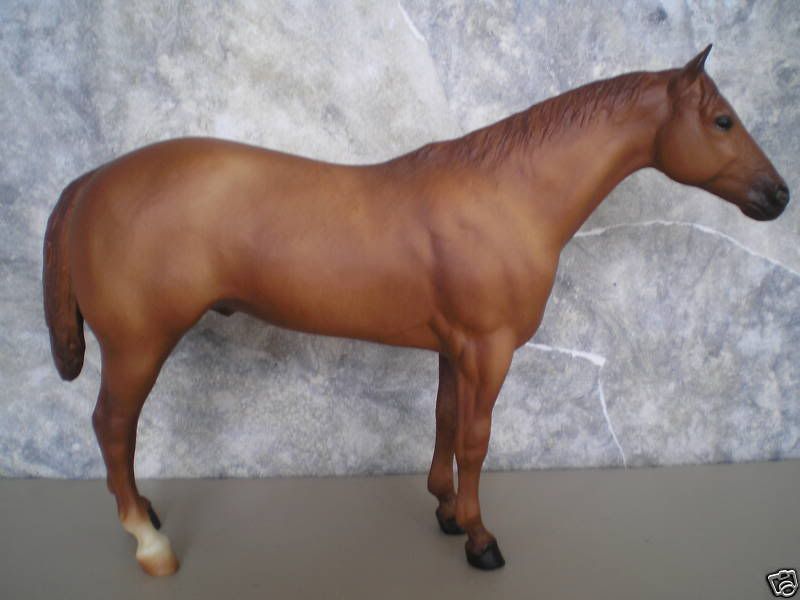
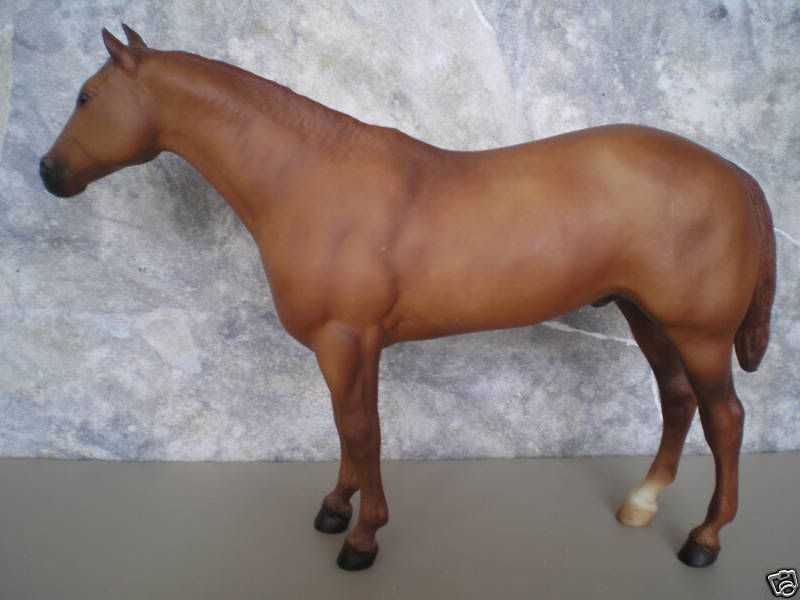
Pick your horse. The one you’re going to tear up. Maybe it’s that Glory model that the tail broke off of; or the old Clydesdale mare that has no ears anymore.
-
-
-
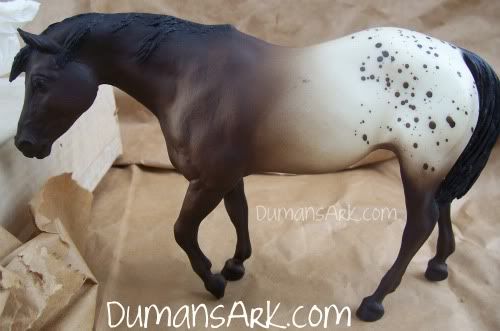
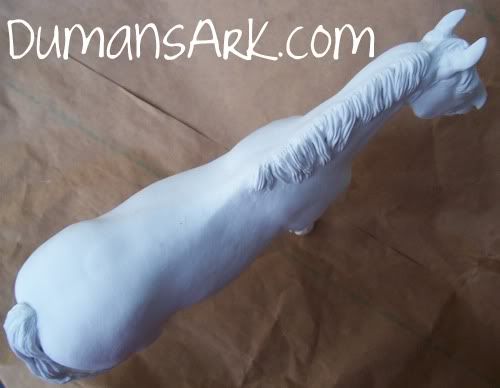
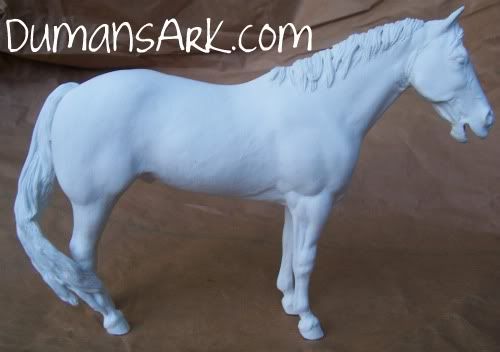
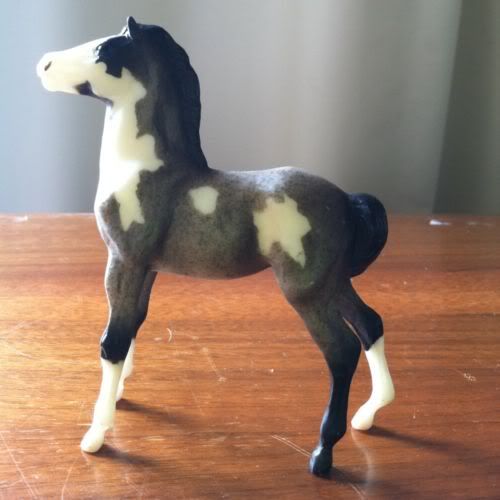
(Above: Hightower in the Stud Spider mold. That face is so blah! And that tail! Let’s do something about that.)
Get some paper and a pencil and sketch what you want the model to look like.
Use a marker or pen to mark where you will need to cut (this is where a mentor is handy, they can explain better how to do this, as it is nice to see it done instead of explained via text).
Get the Dremel out ****note – I’m not responsible for any harm caused etc etc don’t come after me if you lop off a finger, need stitches, or your cat ends up branded or scarred, got it?*** and with adult supervision if you require it, cut into the areas, reposition the model’s limbs, head, tail, and so on as you see fit.
-
-
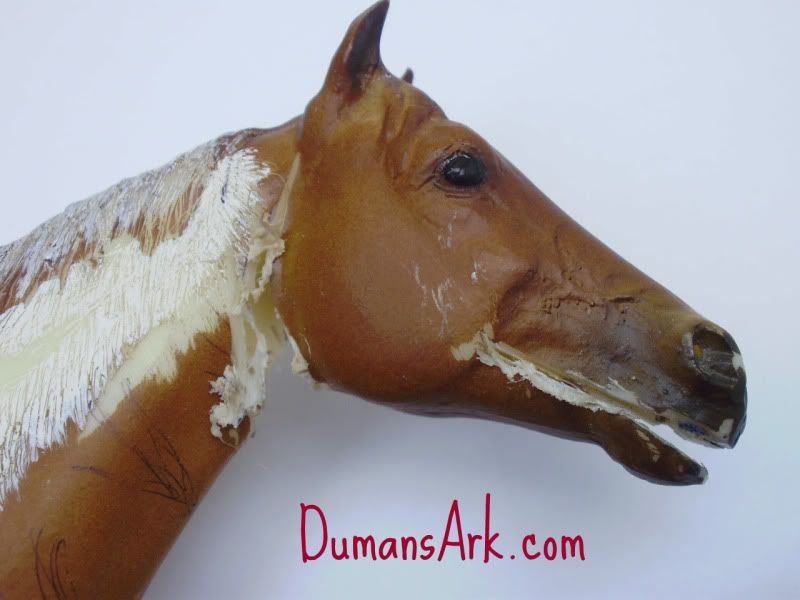
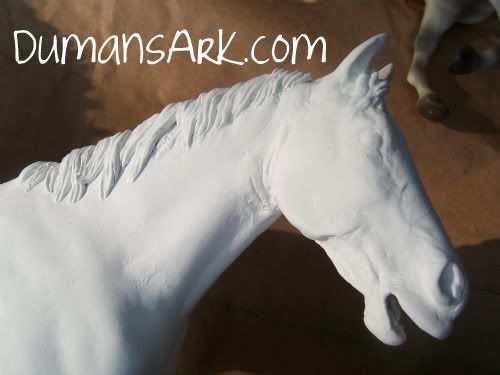
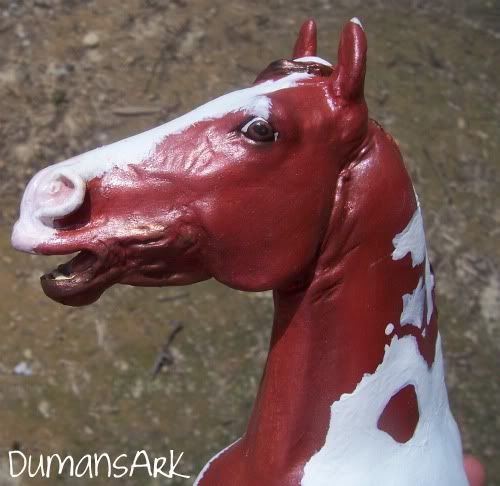
Above: A close up of the now open mouth on Hightower.
From here, I’ll talk about what I did to the Hightower model as an example.
My computer won’t upload the photo of the After Shot that was taken after I heated the face with a blow torch (I did not have a heat gun at the time) and moved the lower jaw down to widen the mouth.
NOTE: I don’t recommend the use of a blow torch. If you think a candle or a lighter is dangerous, a blow torch is, as you can imagine, more extreme. And hot. (I know!)
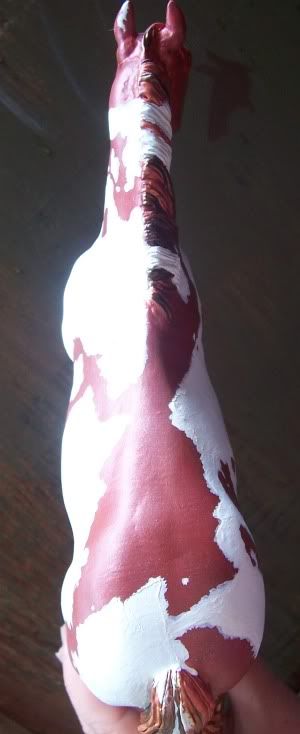
Then I wanted to move the tail. Now at this time, my trusty older Dremel DIED – the bugger, and I didn’t have access to a heat gun or a blow torch so I used the candle (my mentor explicitly informed us this wasn’t a safe method. My mother, who was visiting at the time, explained that a heat gun and Dremel were cheaper than $500 worth of stitches at the ER) and a knife to cut into the heated plastic.
-
-
The candle burned everywhere but the area on the butt that I needed it to. By the time it got heated enough to cut with the knife, the paint and plastic on the model had burned and bubbled and pitted – this would cause much sanding work later. I hate sanding work. Note to self: Buy a darn heat gun and Dremel next time!
The heated tail also bent nicely as I wanted the tail to have a wave to it, and eventually, some length.
Now because the candle heated up a great larger area than intended, the leg (this model has rotten crooked legs) that had been heated and bent outwards to stabilize the model at the beginning, actually melted and twisted a bit. This would also cause much trouble later. I can’t stress enough how important the proper tools are to a fun and easy custom, because fixing a bent leg once isn’t fun, and repairing a melted and twisted leg is even less fun.
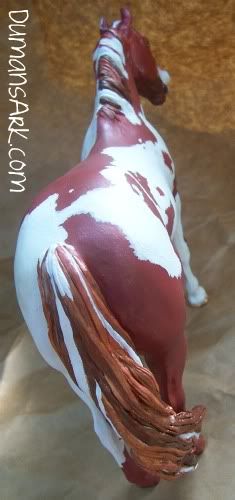
First, I built up the face, adding a tongue, teeth, and lips to the model. The check and jowls looked far too small, so built those up too. Instead of sanding off the mane, I just built onto it to give it some volume.
-
-
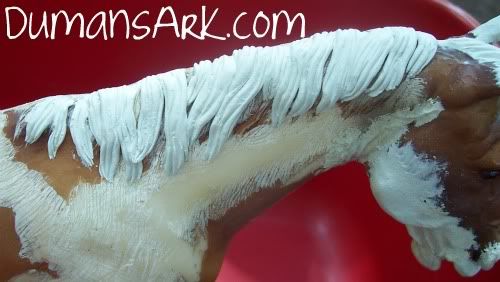
I used the tape to build a tail (visit Don’t Eat the Paint at Blogspot for a tutorial on this method) and covered with epoxy and styled it. Many layers to get the look I was going for.
Then I sanded the ever living snot out of it by hand. This was taking far too long, and since I have the patience and attention span of a ferret I got bored to tears at this task. And the seams on this boy! His groin area was full of oddly bumpy plastic so my mother, wanting to avoid seeing me stitched up, bought me a new Dremel (thanks mom!) which I used to take it all out and just make him a gelding.
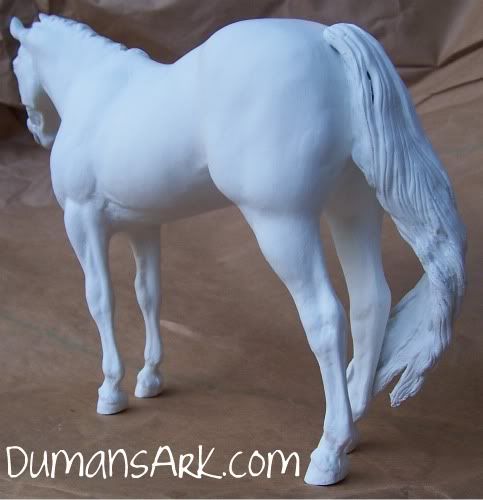
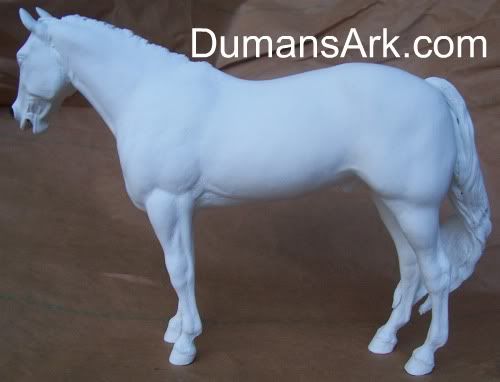
More hand sanding, and now I painted him with the equivalent of Gesso (white acrylic paint). This gives the model a base for painting.
-
-
-
-
-
-
-
-
-
NOW! My next work is a donkey foal.
I am getting lots of help from my live model, who likes to taste my art supplies and take off with my brushes and paint bottles;
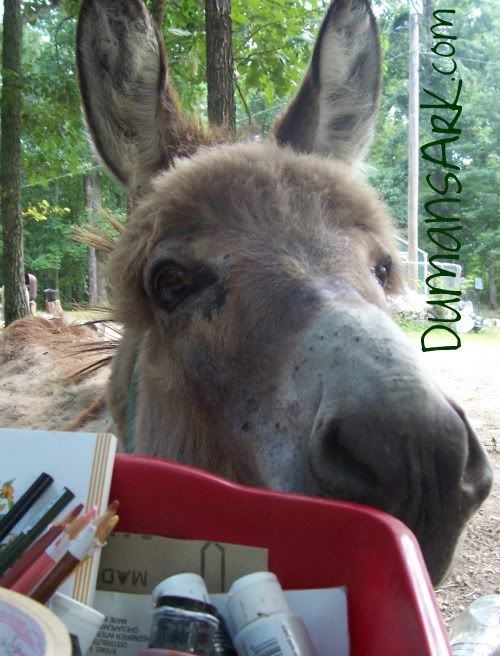
Isn't he sweet? That's Paco for you.
Update:
Thanks Paco! With his help, the model went from looking something like this:
to having ears and a tail

Layers and prepping later:

and TA DA!

The end
;)
Now for the next project: Lonesome Glory turned into... something!
---
Well, Lonesome's project is on hold until I can get ahold of a set of Strapless molds. Until then, my wonderful friend gifted me with this Breyer Shire
(A Chris Hess sculpt!! I love his models.) that had already been started. I wish I could give the customizer a hug; they worked hard and stopped. I get the feeling they didn't have much for help and got frustrated with the progress. The Apoxie type sculpting epoxy they used was a little thick so I sanded down those areas, and in some places it was waxy and shiny; hot glue or did the epoxy not mix right? Epoxy comes in two parts; one is the epoxy, the other part is the hardener. They have to be mixed just right, one part equal to the other to cause the chemical reaction of a fast, strong material that hardens to rock.
I have made the mistake of not mixing it right. What a disaster. But it CAN be fixed! Dremel (or hand sand) away and start over.
Once those spots were sanded away, I liked the pose they chose to put this girl in. But her face looked too blank. I am currenlty *yep, this vision could change ;D) imagining forward ears, mouth open, making it look as if she is nickering and walking up for a treat.
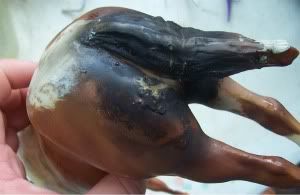
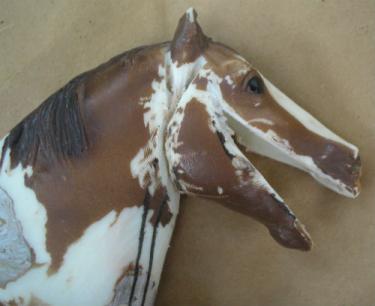
And since you got gypped on the Hightower model's progress, here is a shot of how you open the mouth on a model. It is opened wide to accomadate fingers and tools so you can make teeth, tongue, the soft insides of the mouth and so on.
|